As everyone is aware, Magento is open source, and there are several free and commercial Magento themes available on the market, as well as a slew of extensions developed by Magento Service Provider organizations across the world.
Here is a list of the processes and steps you can take to complete the Magento Template Installation Process in just three simple steps.
1. Downloading a Custom Template from Internet:
First, browse the market for your preferred company theme, and you will find a plethora of paid and free traditional templates. After downloading your templates, you will have two options: hire a Magento Designer from the community or install it yourself using the theme guidelines included with the downloadable package, which can be in zip or tar format; simply save it to your desktop and unzip it.
2. Upload Theme on your eCommerce Website
after unwrapping theme on your desktop you will have to check how much folders it have, here is how the structure will look like:
There will be three folders probably on root:
2.1. APP – PHP, HTML, XML
All php and html files are placed to this folder, and it will be in the format of
Modules – app/Code/(local or community)/ customtemplatename/……
PHTML Files– app/design/frontend/customtemplatename/templates
XML File– app/design/frontend/customtemplatename/layout
2.2. JS – TEMPLATE JAVASCRIPT FILES
Every custom JS files will be placed on the root/js folder where you will see all template related JavaScript files used.
2.3. SKIN – TEMPLATE CSS, JS and IMAGES
skin folder contains all the css, images related stuff of theme, the structure will be like:
Main Folder – skin/frontend/customtemplatename
Template CSS – skin/frontend/customtemplatename/css
Theme JS – skin/frontend/customtemplatename/js
Templates Images – skin/frontend/ customtemplatename/images
Simply follow above structure and copy all the themes files according to above listed directories for your custom Magento theme integration.
3. ACTIVATE YOUR CUSTOM MAGENTO THEME
After finishing step 2 of integrating all the files to you Magento setup you just have to activate the theme.
There is two way where you can define to enable the theme from Magento Admin itself.
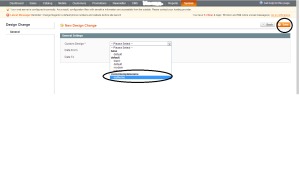
3.1 Process First – Login to your Magento Admin panel and go to
Admin -> System -> Design – and click on add design changes – Follow below Screenshot

Follow below screenshot to see next page, and the template name you see just select and click on save

3.2 Process Second:
Here is the second step how you will activate your custom template design with Magento
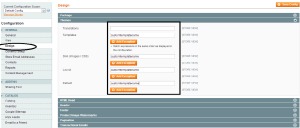
From Magento admin go to – System -> Configuration – and you will a DESIGN tab from the left sidebar, just click on it and you will see a new screen on main content area and then click on “THEMES” header to expand this section:
You will notice five primary fields that compose your theme depending on the file structure where you must provide a suitable name that you wish to refer to:
Translation – keep it blank unless you are using multiple languages
Templates – In this text box just have your template name inserted in the text box
Skin – (Images, CSS) – Just put your custom template name skin folder
Layout – Put your layout folder same as you have mentioned in the templates
Default – Put your template package name in this field
Here is the screenshot of this page:

Just save your configuration on this page and go to frontend and hard refresh the page after clearing cache from Magento Admin Panel – System – Cache Management select all cache and flush it.
That’s it, you are done with it and if you still see any issue then comment it here, and I’ll try to help you out.
Have a good day.


