With growing eCommerce businesses, it also increases the responsibility of the shop owners to engage with their customers in a better way. When you offer multiple currency options on your store, it makes various customers from different countries using various currencies, purchase products from you.
There are various stages for the Currency configuration in Magento® 2. Let us go through one by one:
Step 1: Defining the currencies
- Navigate to Stores > Configuration > General Menu > Currency Set Up.
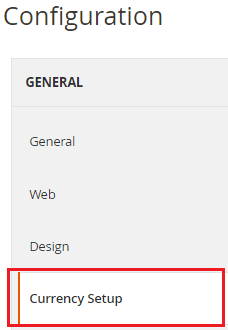
- The configuration will open up. Click on Currency Options and do the settings.
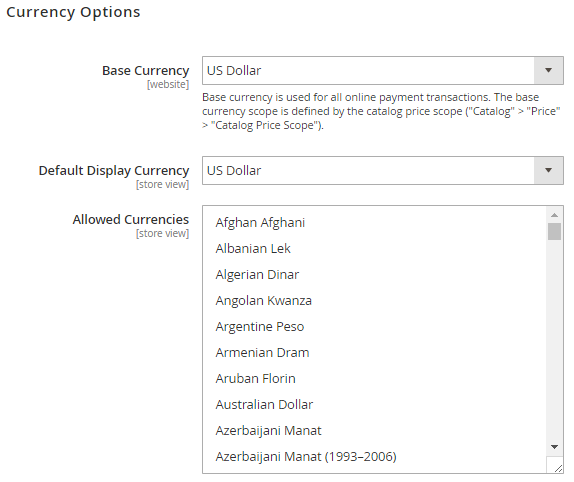
- Base currency: Select the base for the online transactions
- Default display currency: This is the default currency which will be displayed under the pricing in your store.
- Allowed Currencies: Here, you can select multiple currencies which you wish to allow on your store. For selecting multiple currencies press Ctrl button from your keyboard and select the options from the list.
Step 2: Setting the Import connection
- To set up the import connection, Click on Webservicex from the Currency settings page.

- Connection timeout in seconds: Enter the time in seconds for the timeout for the connection.
Step 3: Configuring the Scheduled Import settings
- Click on Scheduled Import settings from the Currency set up tab.
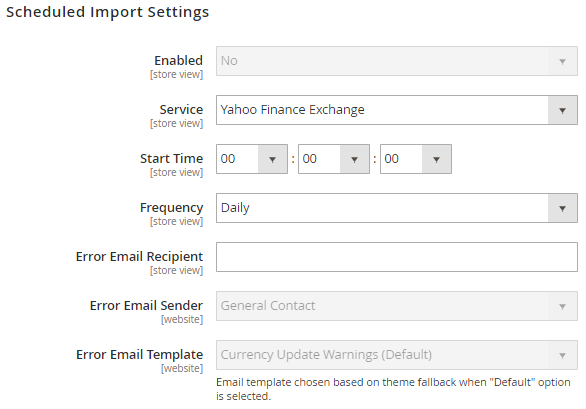
- Enabled: Select Yes from the option to auto update the currency rates on your store.
- Service: Select the service from the drop down list. For this field, Web services is the default value.
- Start time: Set the time in Hours, minutes and seconds after which the currency rates will be updated.
- Frequency: You can select the frequency for the rate update as daily, weekly or monthly.
- Error Email Recipient: Here, you can mention the email addresses of the people to whom you wish to notify about the errors.
- Error Email sender: Mention the name of the sender which will appear on the sent email.
- Error Email Template: Select the email template for the notifying the people about the errors.
Step 4: Updating Currency rates
- Navigate to Stores > Currency Rates.
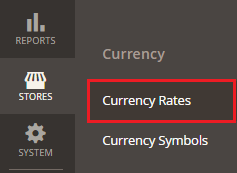
- Currency Rates settings page will open up.
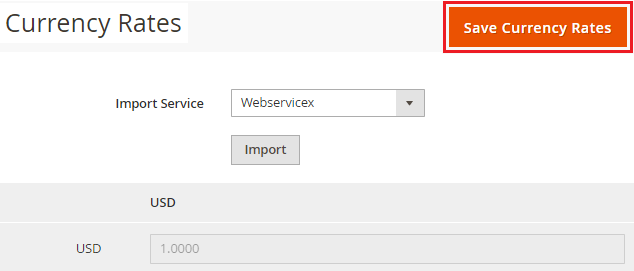
- Choose the Import Service from the drop down. For this field, the default value is Webservicex.
- After that click on the Import The new rates show up in the Currency Rates list.
- Click Save Currency Ratesand your import is done.
Step 5: Modifying the currency symbols
- Navigate to Stores > Currency Symbols.
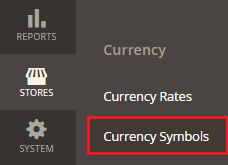
- Settings page for currency symbols will open.

- Insert the custom currency that you want after clearing the Use Standard
- To enable the new symbol just Save Currency Symbols.
- Refresh the cache by clicking the Cache Management to apply the changes on the store front end.
With this step, we come to the end of this tutorial. You can follow the above steps to configure the currencies in your Magento® 2 store.
If you are facing any issue while setting the currencies in your Magento® 2 based store, you can get in touch with us our Magento® 2 experts to get the resolution of the issue.


I was unaware that there are multiple steps for configuring the currency in an eCommerce store. After reading this blog post, I think that all the steps are really critical to follow while setting up the currencies in my store. Thanks for informing this to me.